Hey there, Nintendo Switch Console or Emulator players! Have you ever wanted to quickly and easily switch between different game file formats? You’re in luck, though! That’s what this guide is all about achieving. I’ll demonstrate how to convert NSP files to XCI and vice versa with ease. You don’t need to worry about technical details because I’ll keep things easy to understand. So stay with me if you want to increase the number of games you can play and enjoy your favorite titles without any hassles. Together, let’s explore and learn about the file conversion process!
Table of Contents
Steps to Convert NSP to XCI
Here is a simple step-by-step guide on how to Convert NSP ROM file to XCI ROM file:
1. Setting Up SAK (Switch Army Knife)
We’re going to use the SAK (Switch Army Knife) tool for this tutorial. Follow these steps to download and set up the SAK tool:
Step 1: Download the latest SAK (Switch Army Knife) 7z file, either 64-bit or 32-bit, according to your preference from the button provided below.
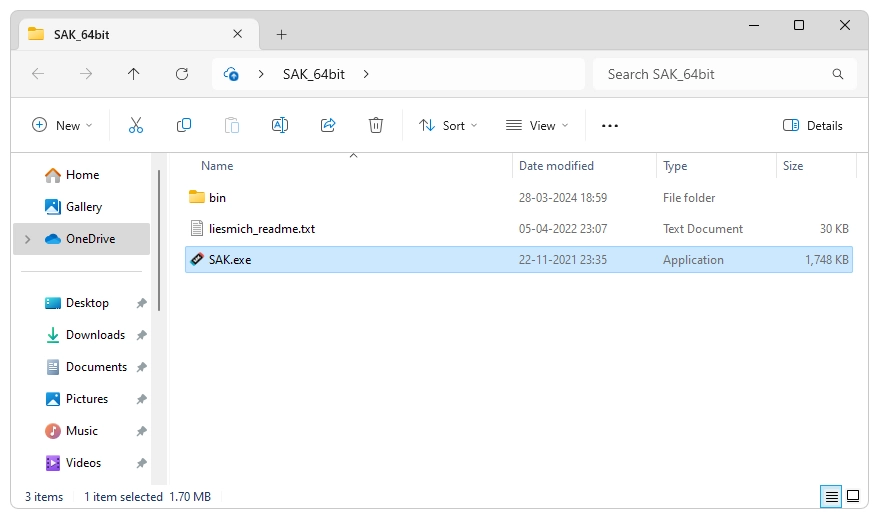
Step 1: Extract the SAK_64bit or SAK_32bit folder from the 7z file. You can use any extractor for that, such as 7zip.

Step 2: Now open the extracted SAK folder and navigate to the ‘bin‘ folder within it.

Step 3: Paste the latest prod.keys file into this ‘bin‘ folder. If you don’t have the latest prod.keys, you can download it from the button below.

2. Select the File You Want to Convert
Once you have downloaded the SAK tool and installed the prod.keys, follow these steps to continue:
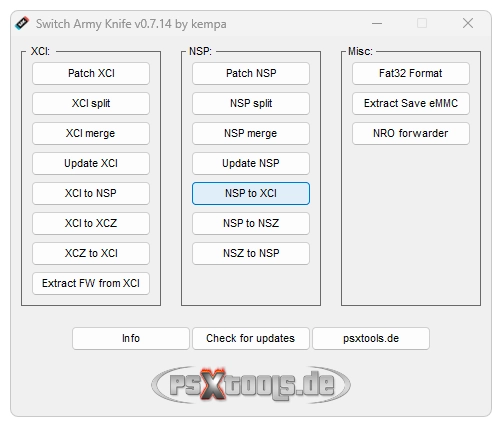
Step 1: Open the SAK folder you extracted earlier and run the SAK.exe file.
Step 2: Click on the ‘NSP to XCI‘ option to convert NSP ROM to XCI.
Step 3: Now, click on the ‘Open NSP‘ button.

Step 4: Navigate to and select the NSP file you want to convert to XCI. For this tutorial, I’m selecting “Xenoblade Chronicles 3 [010074F013262000][v0][US].nsp” file.

Step 5: After selecting the NSP ROM file, click on the ‘Convert NSP file‘ button.
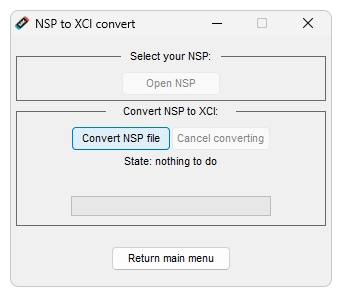
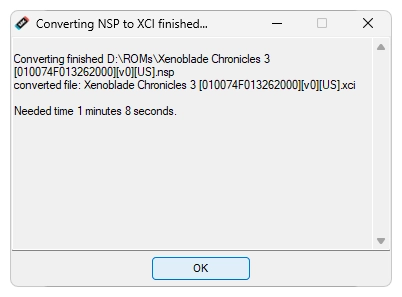
Step 6: It’ll take some time depending on the file size you want to convert, and then you’ll see a message ‘Converting NSP to XCI finished…’. Click OK.
3. Getting the Converted File
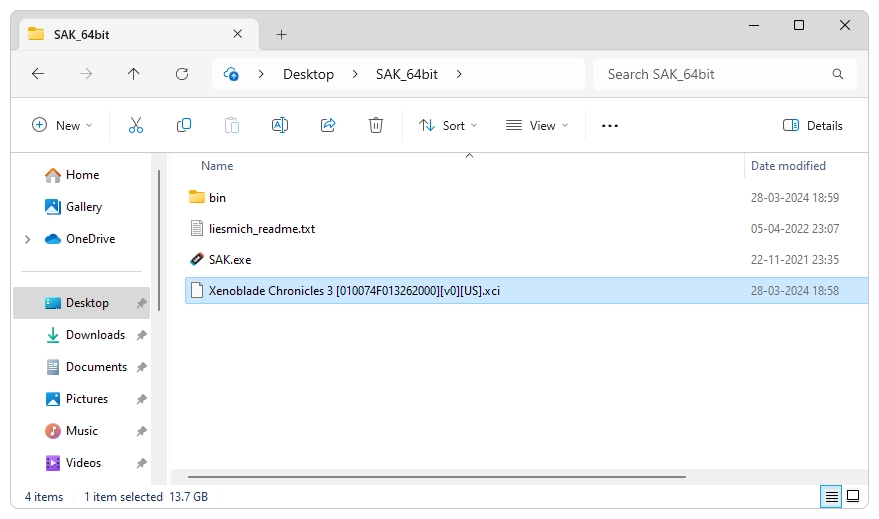
After the conversion is finished, close the SAK application, and navigate to the SAK folder you extracted. You can find the converted file, as shown in the image below. The file is converted to “Xenoblade Chronicles 3 [010074F013262000][v0][US].xci“.
Steps to Convert XCI to NSP
Converting an XCI file to NSP follows the exact same process as converting NSP to XCI. You just have to select the ‘XCI to NSP‘ option instead of the ‘NSP to XCI‘ option, and the rest remains the same. The output will also be in the same location.
Conslusion
In conclusion, this guide has provided you, whether you’re a Nintendo Switch console user or an emulator player, with a straightforward method to effortlessly convert game files between NSP and XCI formats. By following the steps outlined here, you can seamlessly switch between formats, expanding your gaming options without any technical hurdles. Whether you’re converting NSP to XCI or vice versa, the process remains simple and accessible. With the assistance of the Switch Army Knife (SAK) tool and clear instructions provided, you can enjoy your favorite titles hassle-free. So, dive in, explore the file conversion process, and unlock a world of gaming possibilities!